Hi! In this post we are going to set up an OpenVPN Client in Ubuntu 18.04 LTS. Most of the available tutorials posted on the Internet were about how to configure an OpenVPN server. There are a lot of OpenVPN providers in the market. I personally liked OpenVPN service from StrongVPN because they offer a wide selections of VPN protocols, and we can change server locations easily. New network routers also features OpenVPN connection capabilities, which let us connect to our home or office network.
Prerequisite
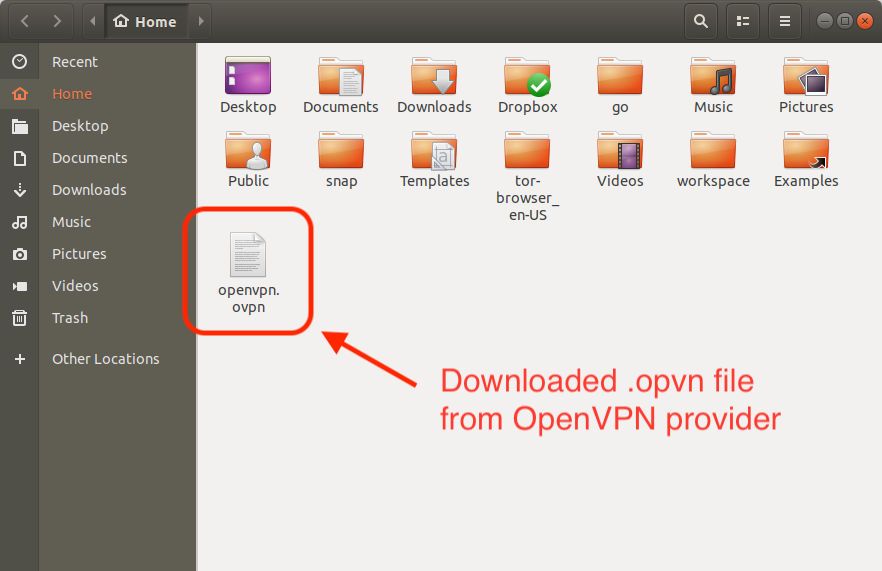
- We will need to have an .ovpn file downloaded from an OpenVPN provider.
- A running Ubuntu 18.04 LTS with GNOME Desktop
- Start by opening our terminal and type the following commands. (This requires root privileges)
sudo apt install openvpn network-manager-openvpn
sudo apt install network-manager-openvpn-gnome
After we’ve successfully installed the required software, we can then proceed with configuring the VPN connection.
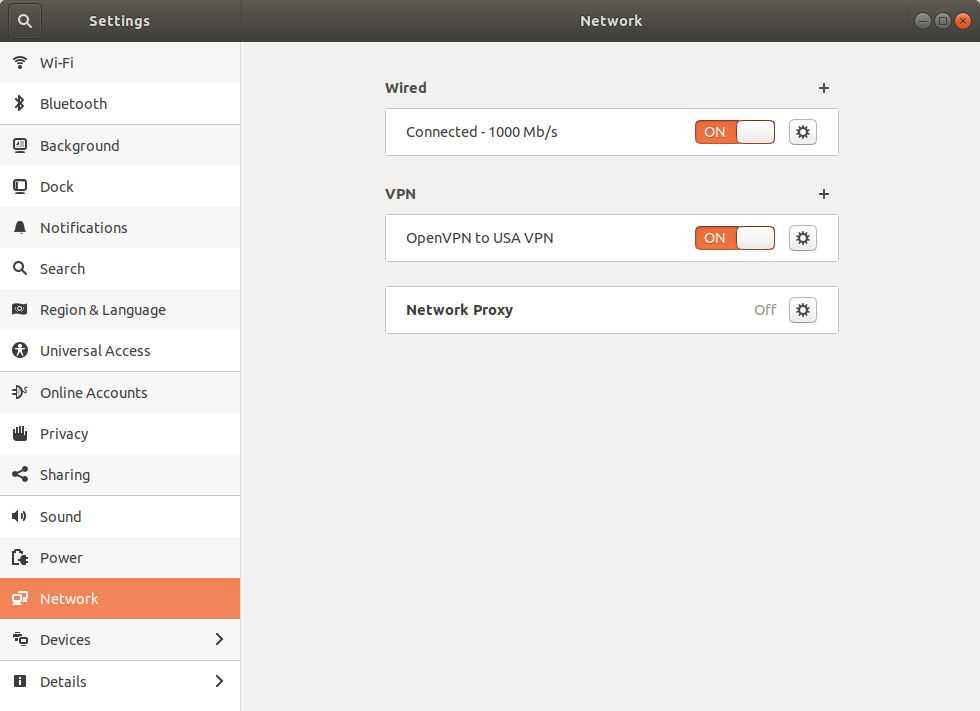
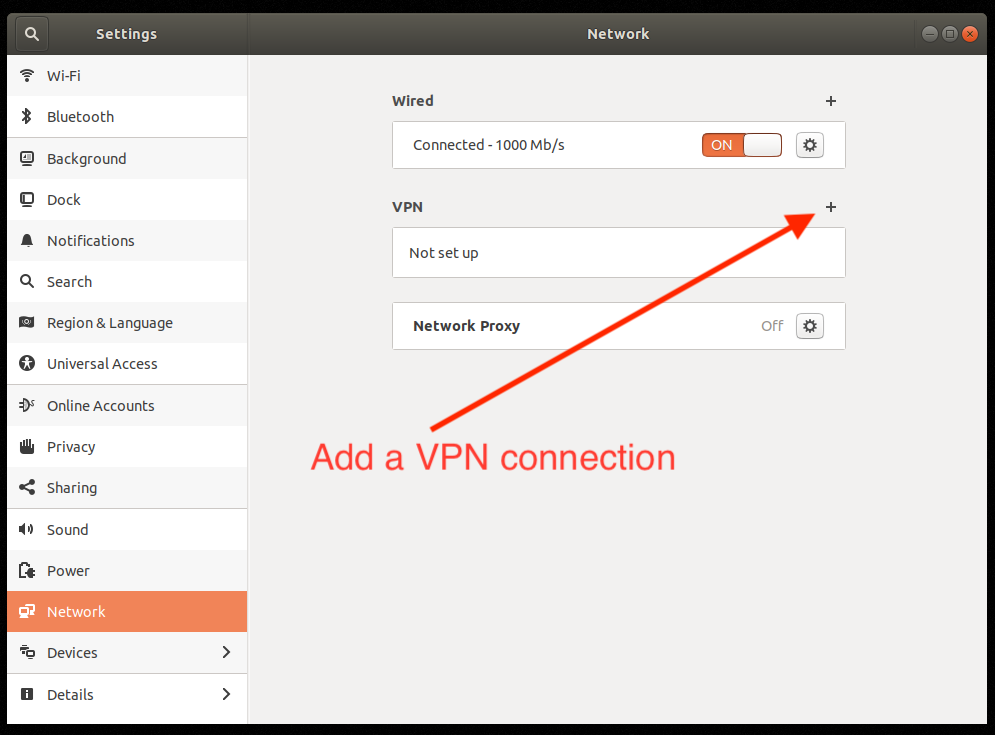
- Go to Network Manager

- Add VPN Connection
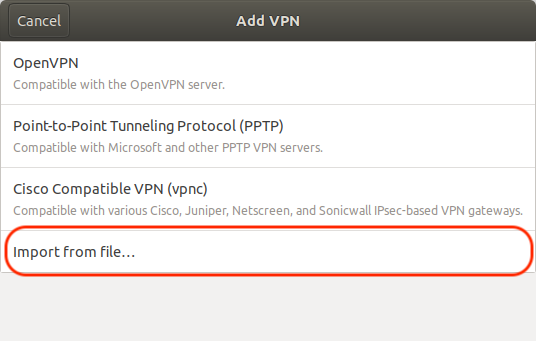
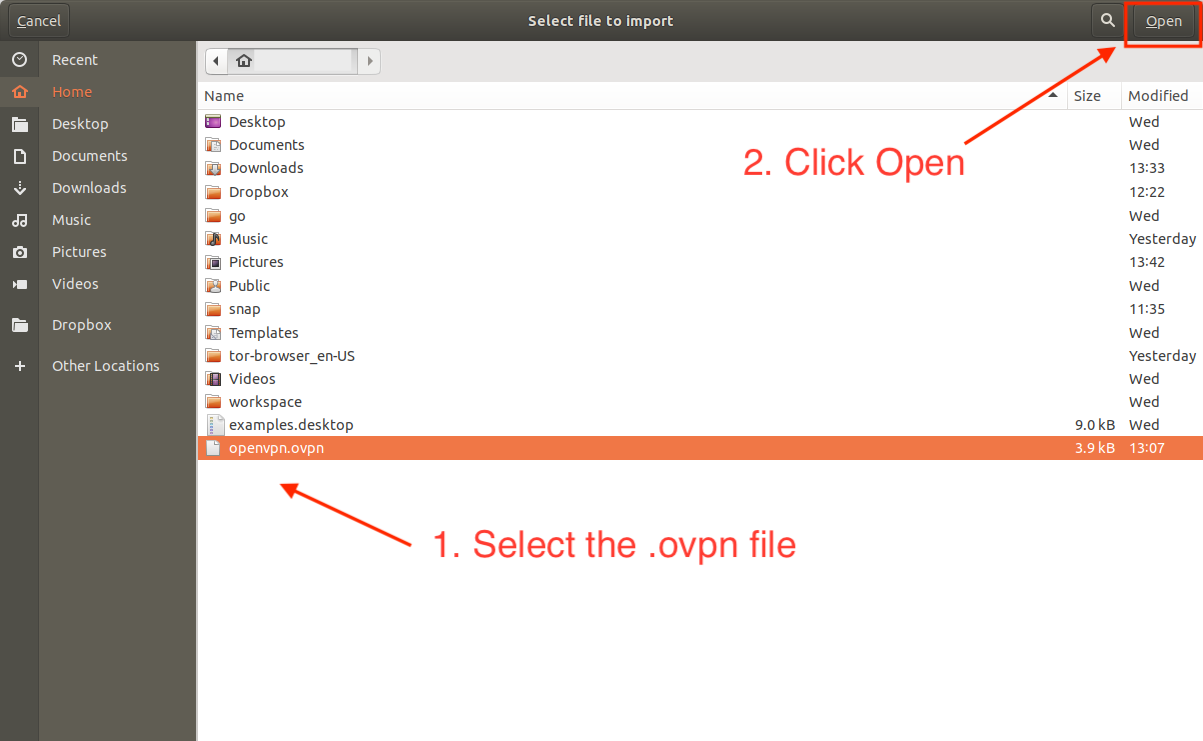
- Select Import from file
- Choose and open the downloaded .ovpn file from our OpenVPN provider
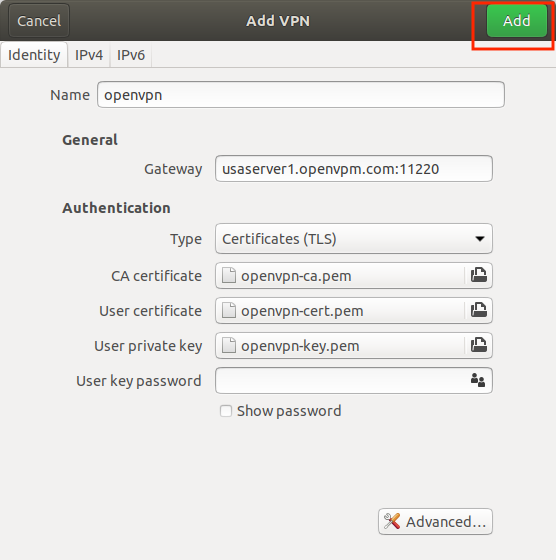
- Confirm the imported .ovpn file. We can change the name of the VPN connection if we want to. Click Add to complete
- Once the import and configuration is complete, we can now connect to our OpenVPN.